You may know how to change IP address via GUI. It's pretty easy. Just go to Control panel > network and internet, selecting the IPv4 Properties and change the IP address. This whole process will take around a minute to do so. But what if you have to do it on multiple systems and repeat all these steps multiple times. It will become really tiresome. PowerShell can do this tedious task very easily.
PowerShell may sound difficult to use and you may hesitate to work on it but it has several unique features.
With PowerShell, you can gather information, change system settings and automate most anything on Windows. It's more powerful than Cmd and offers more flexibility. Tasks done with PowerShell does not only automated but they also save time.
To Open PowerShell, type PowerShell in the search bar of your Windows 10 computer, then press Ctrl+Shift+Enter to launch it with administrator privileges.
To see the current IP configuration, type Get-NetIPAddress in PowerShell
Get-NetIPAddress
Get-NetIPAddress gives IP address information with prefix length and address family.
Image may be NSFW.
Clik here to view.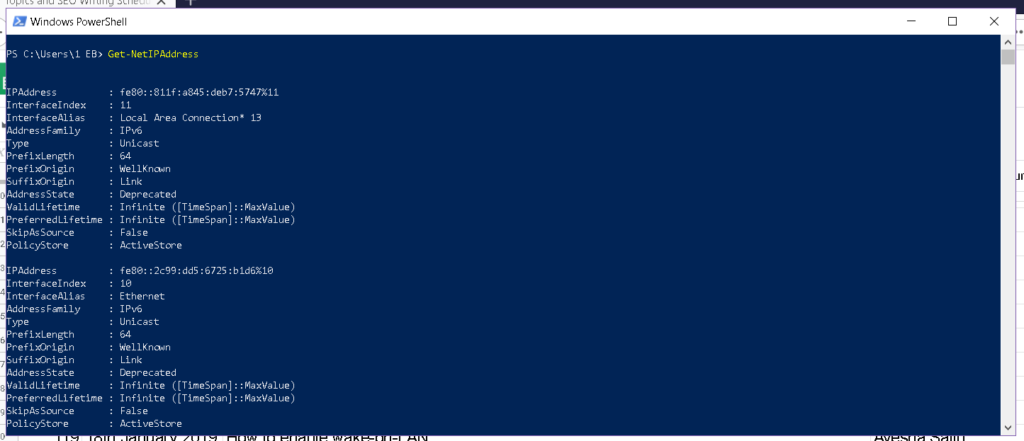
Get-NetIPConfiguration
Alternatively, you can type Get-NetIPConfiguration to get some advanced details. It gives IP address information along with its default gateway, DNS information and Interface index.
From Get-NetIPConfiguration Result, note down the index number of the adapter for which you want to change IP address.
Image may be NSFW.
Clik here to view.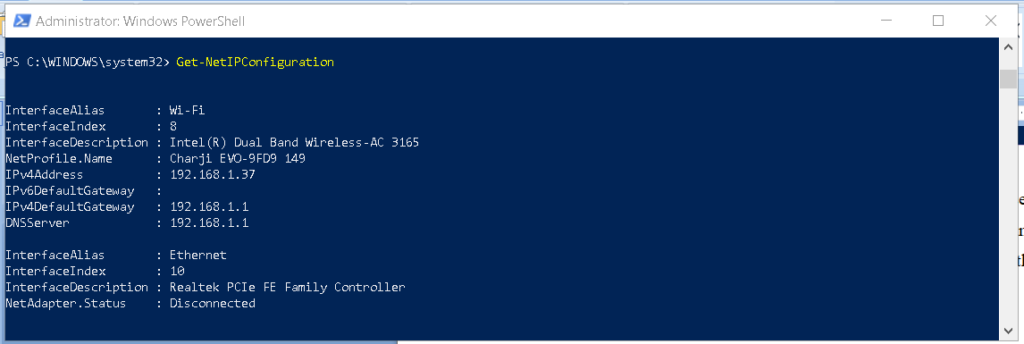
To specifically get the Interface index, type
Get-NetAdapter
in PowerShell:
Image may be NSFW.
Clik here to view.
Set a new IP address using PowerShell
All of the above commands are used to view current configurations. To set a new IP address, execute below command. Replace xxx.xxx.xxx.xxx with your own IP address.
New-NetIPAddress -InterfaceIndex “IndexNo” -IPAddress xxx.xxx.xxx.xxx -PrefixLength 24 -DefaultGateway xxx.xxx.xxx.xxx
Suppose we have the following required configurations:
IndexNo: 8
IPAddress: 192.168.1.38
PrefixLength: 24
DefaultGateway : 192.168.1.1
Replace the command parameters with your own addresses.
Note that the prefix length specifies the subnet mask of IP address.
Image may be NSFW.
Clik here to view.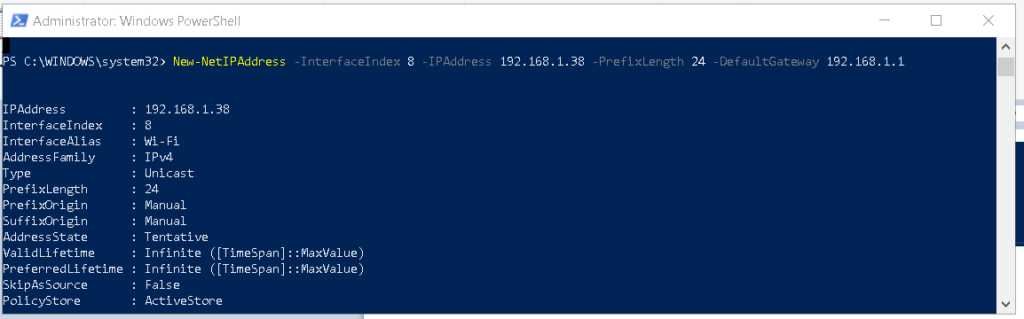
Set a New DNS Servers Address
Up till now, we have configured IP address, subnet mask, and Default-gateway successfully. Now one thing is missing that is DNS server address. to set new DNS server address, type the command in below syntax.
Set-DnsClientServerAddress -InterfaceIndex "IndexNo" -ServerAddresses "xxx.xxx.xxx.xxx , xxx.xxx.xxx.xxx"
Replace xxx.xxx.xxx.xxx with your required primary and secondary DNS server addresses.
Image may be NSFW.
Clik here to view.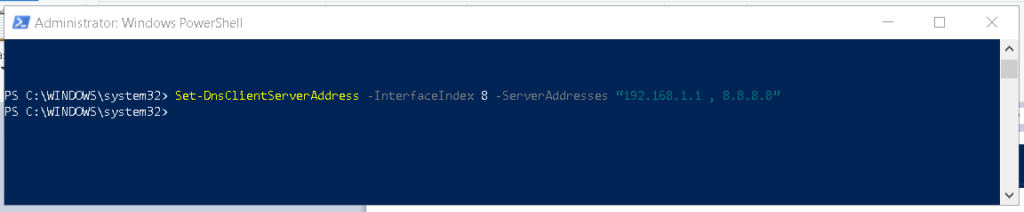 If you want to remove the IP address with PowerShell, use the following command
Remove-NetIPAddress -IPAddress "xxx.xxx.xxx.xxx"
Image may be NSFW.
Clik here to view.
As you can see, it is relatively straightforward to configure TCP/IP through PowerShell. The techniques that I have shown you tend to be most useful when you need to configure multiple machines.
The post How to Change Your IP Address in Windows Using PowerShell appeared first on FAQforge.